Suppression List
updated 2 years ago
In this article:
- How are users added to the Suppression List
- How to view the Suppression List
- How to manually add emails to your Suppression List
- How to remove emails from the Suppression List
Suppression List is a special type of List for email addresses you do not want emails to be delivered to. It helps ensure your deliverability and engagement are good by ensuring you do not send emails to users who do not want to receive them.
How are users added to the Suppression List
Users are added to the Suppression List in two ways:
Users are manually added when you "Suppress" them. You can also upload a file containing the emails you want to suppress. More on this below.
Users are automatically added when they:
Complain about your email or mark it as spam.
Unsubscribe from a broadcast with Global Suppression turned on.
Have a hard bounce–a failed email delivery due to a reason that is not temporary.
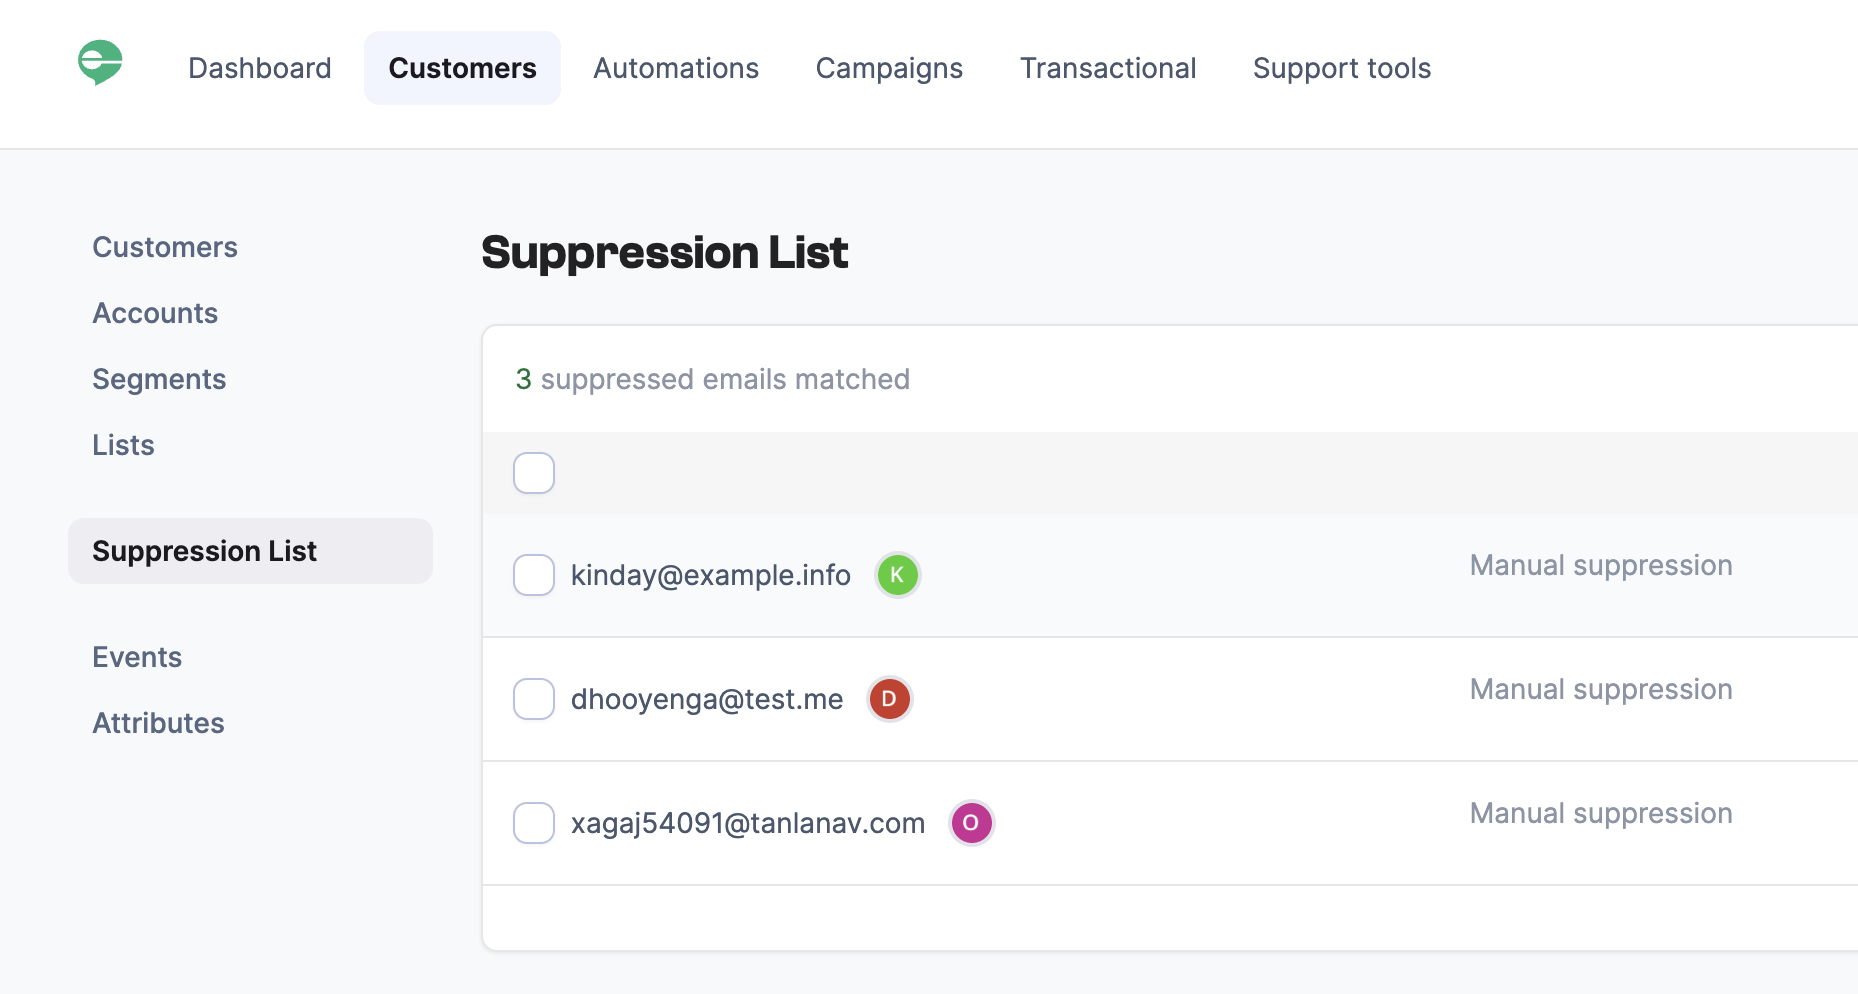
How to view the Suppression List
To view your Suppression List,
Click on Customers on the dashboard.
Click on Suppression List.
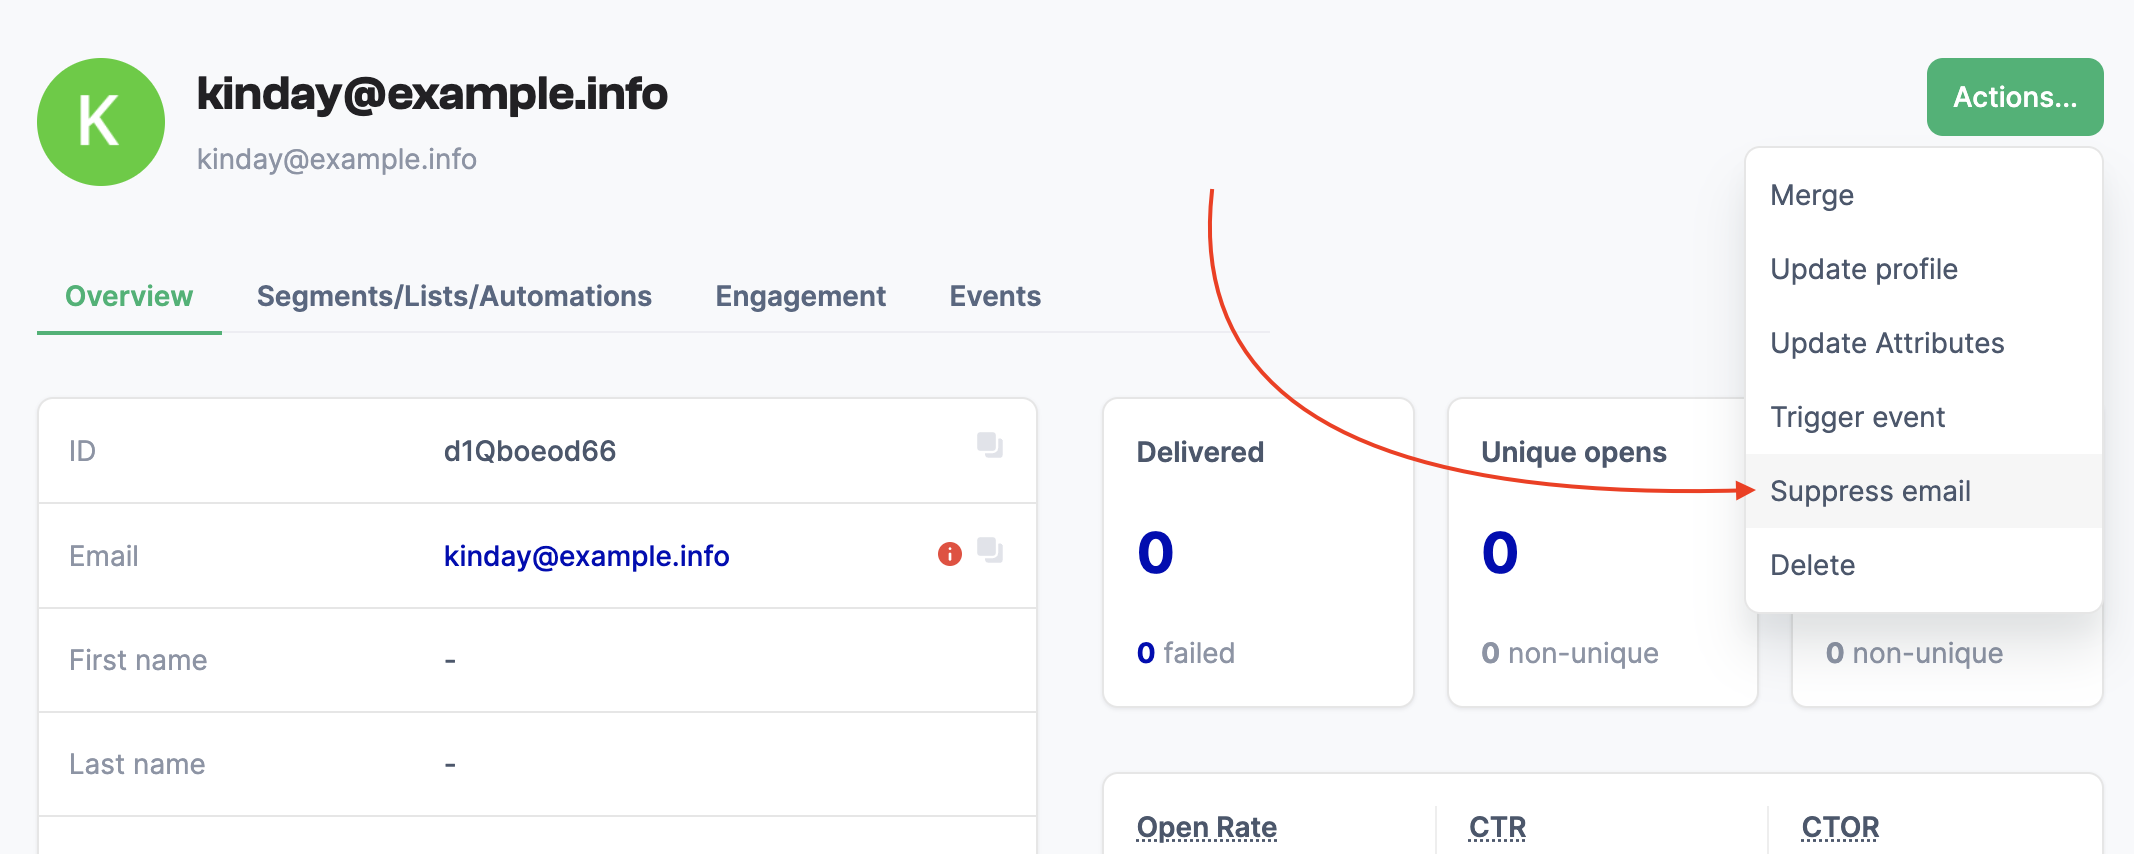
How to manually add emails to your Suppression List
To manually add an email address to your Suppression List:
Visit the profile of the Customer or Account with the email.
Click the Actions button and click the Suppress email option.
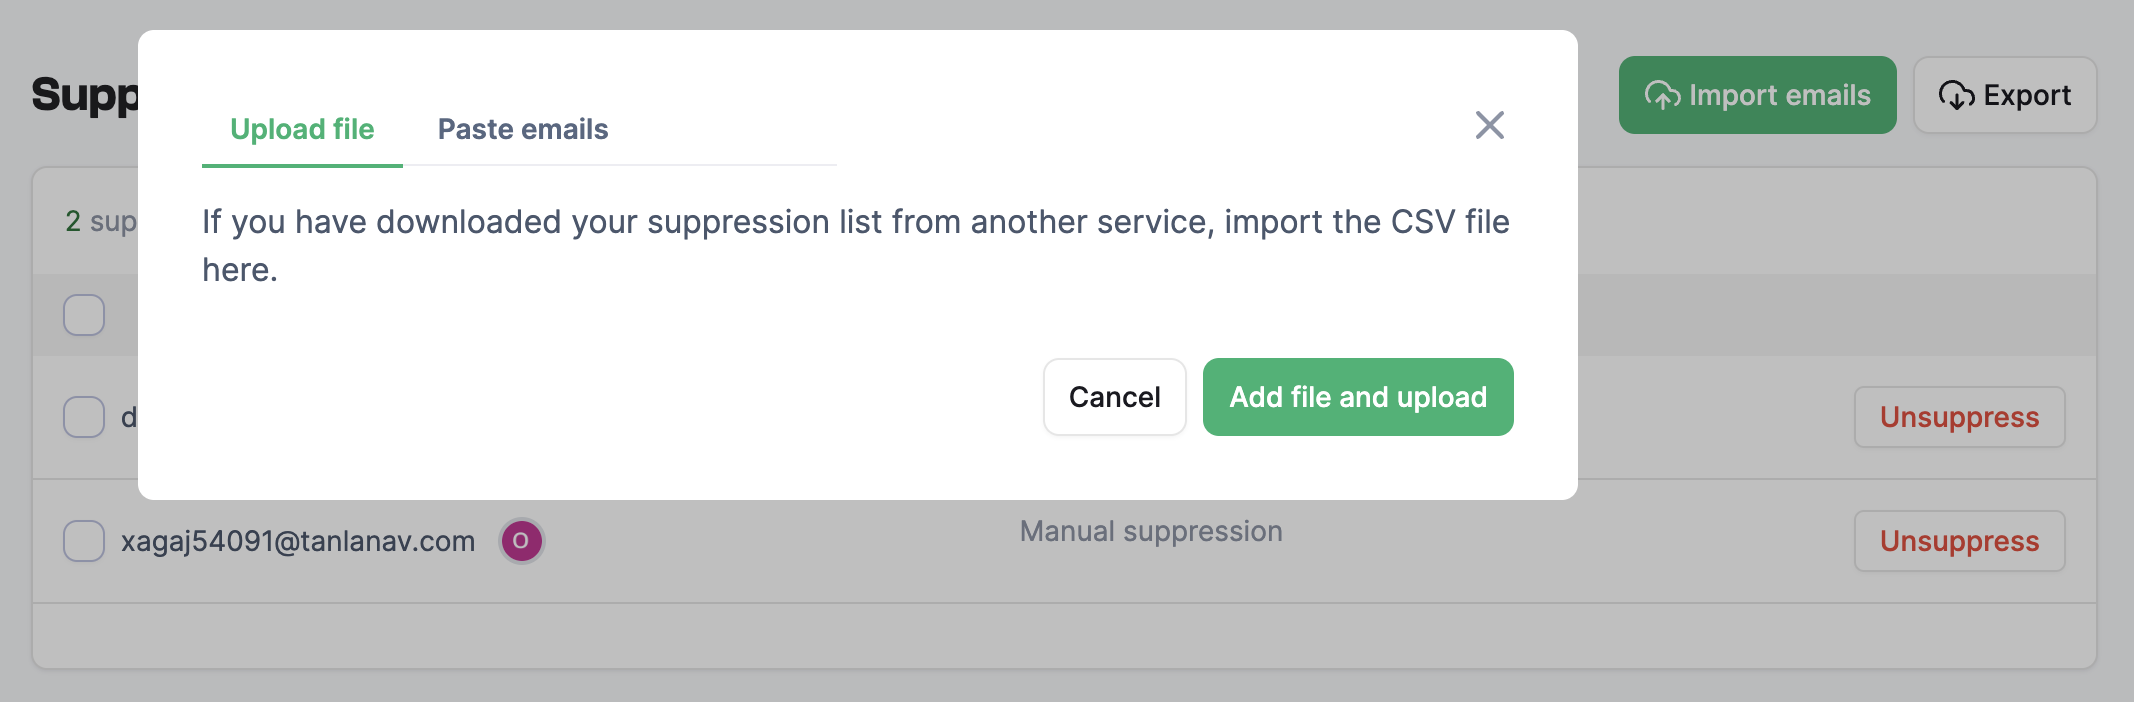
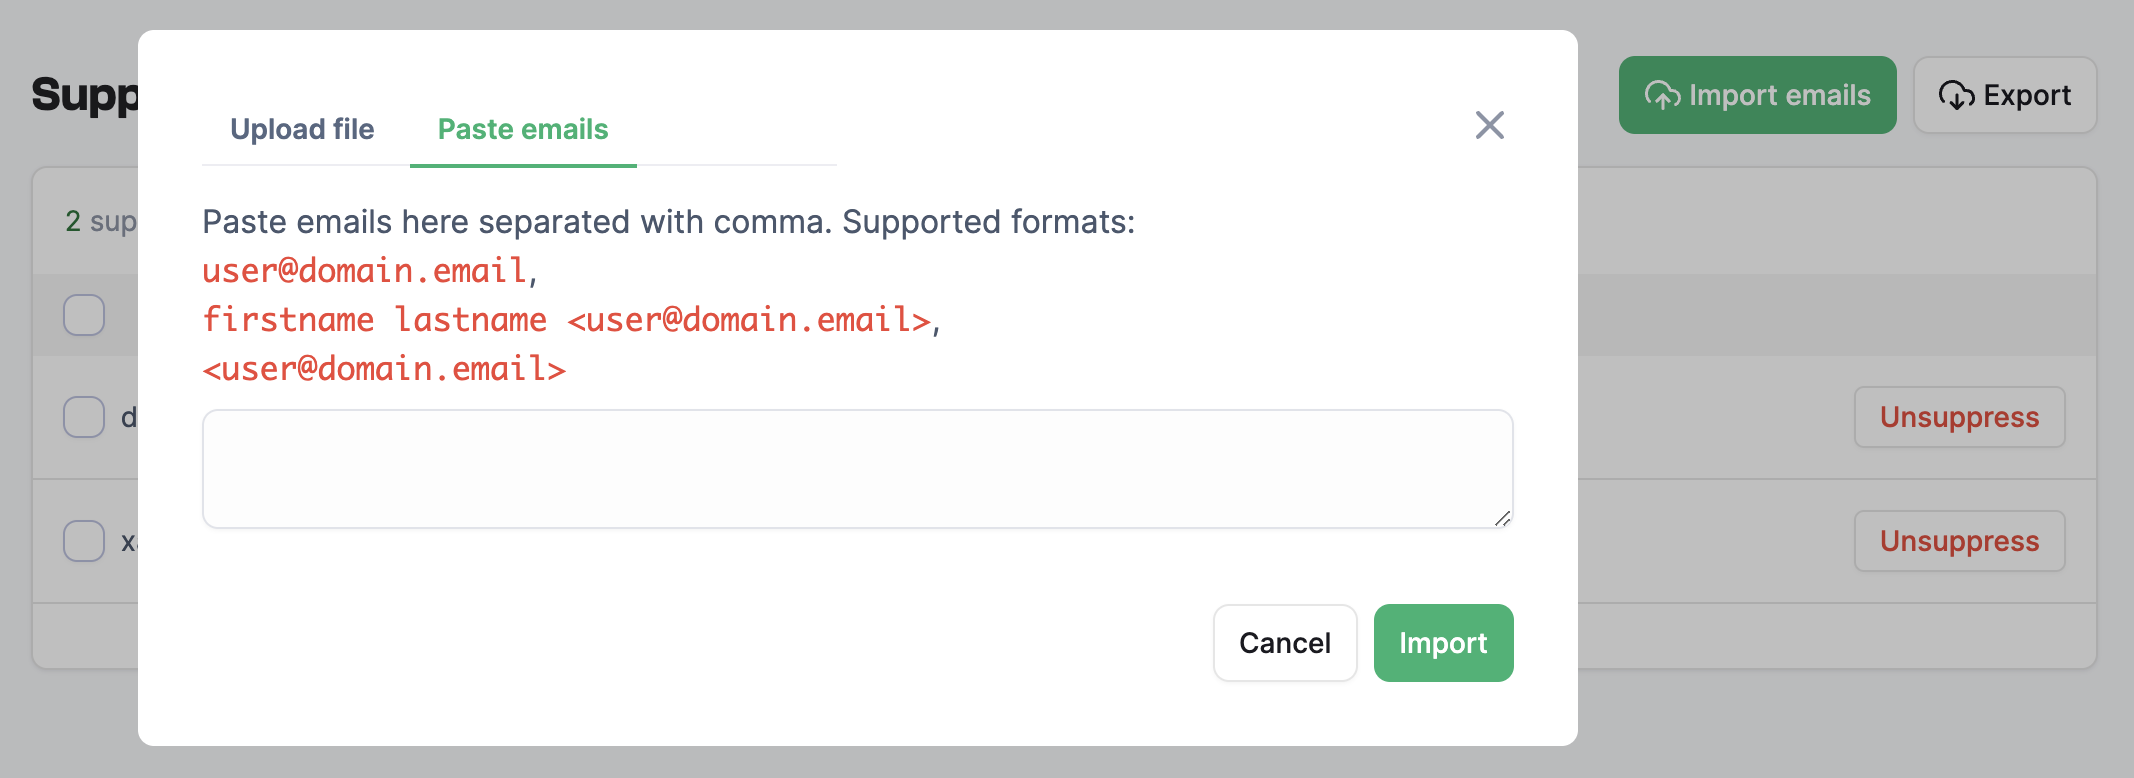
To add multiple email addresses to your Suppression List:
Visit the Suppression List page.
Click on the Import button.
Select a CSV file with the email addresses you want to suppress. You can also use the paste option. To use the paste option, click on the Paste emails tab, copy the emails you want to suppress, and paste them in the textbox.
How to remove emails from the Suppression List
To remove an email from the Suppression List:
Visit the Suppression List page.
Click the Unsuppress button beside the email. You can also check multiple email addresses and Unsuppress all at once.

Was this article helpful?