How to create a Segment
updated 2 years ago
In this article:
Introduction
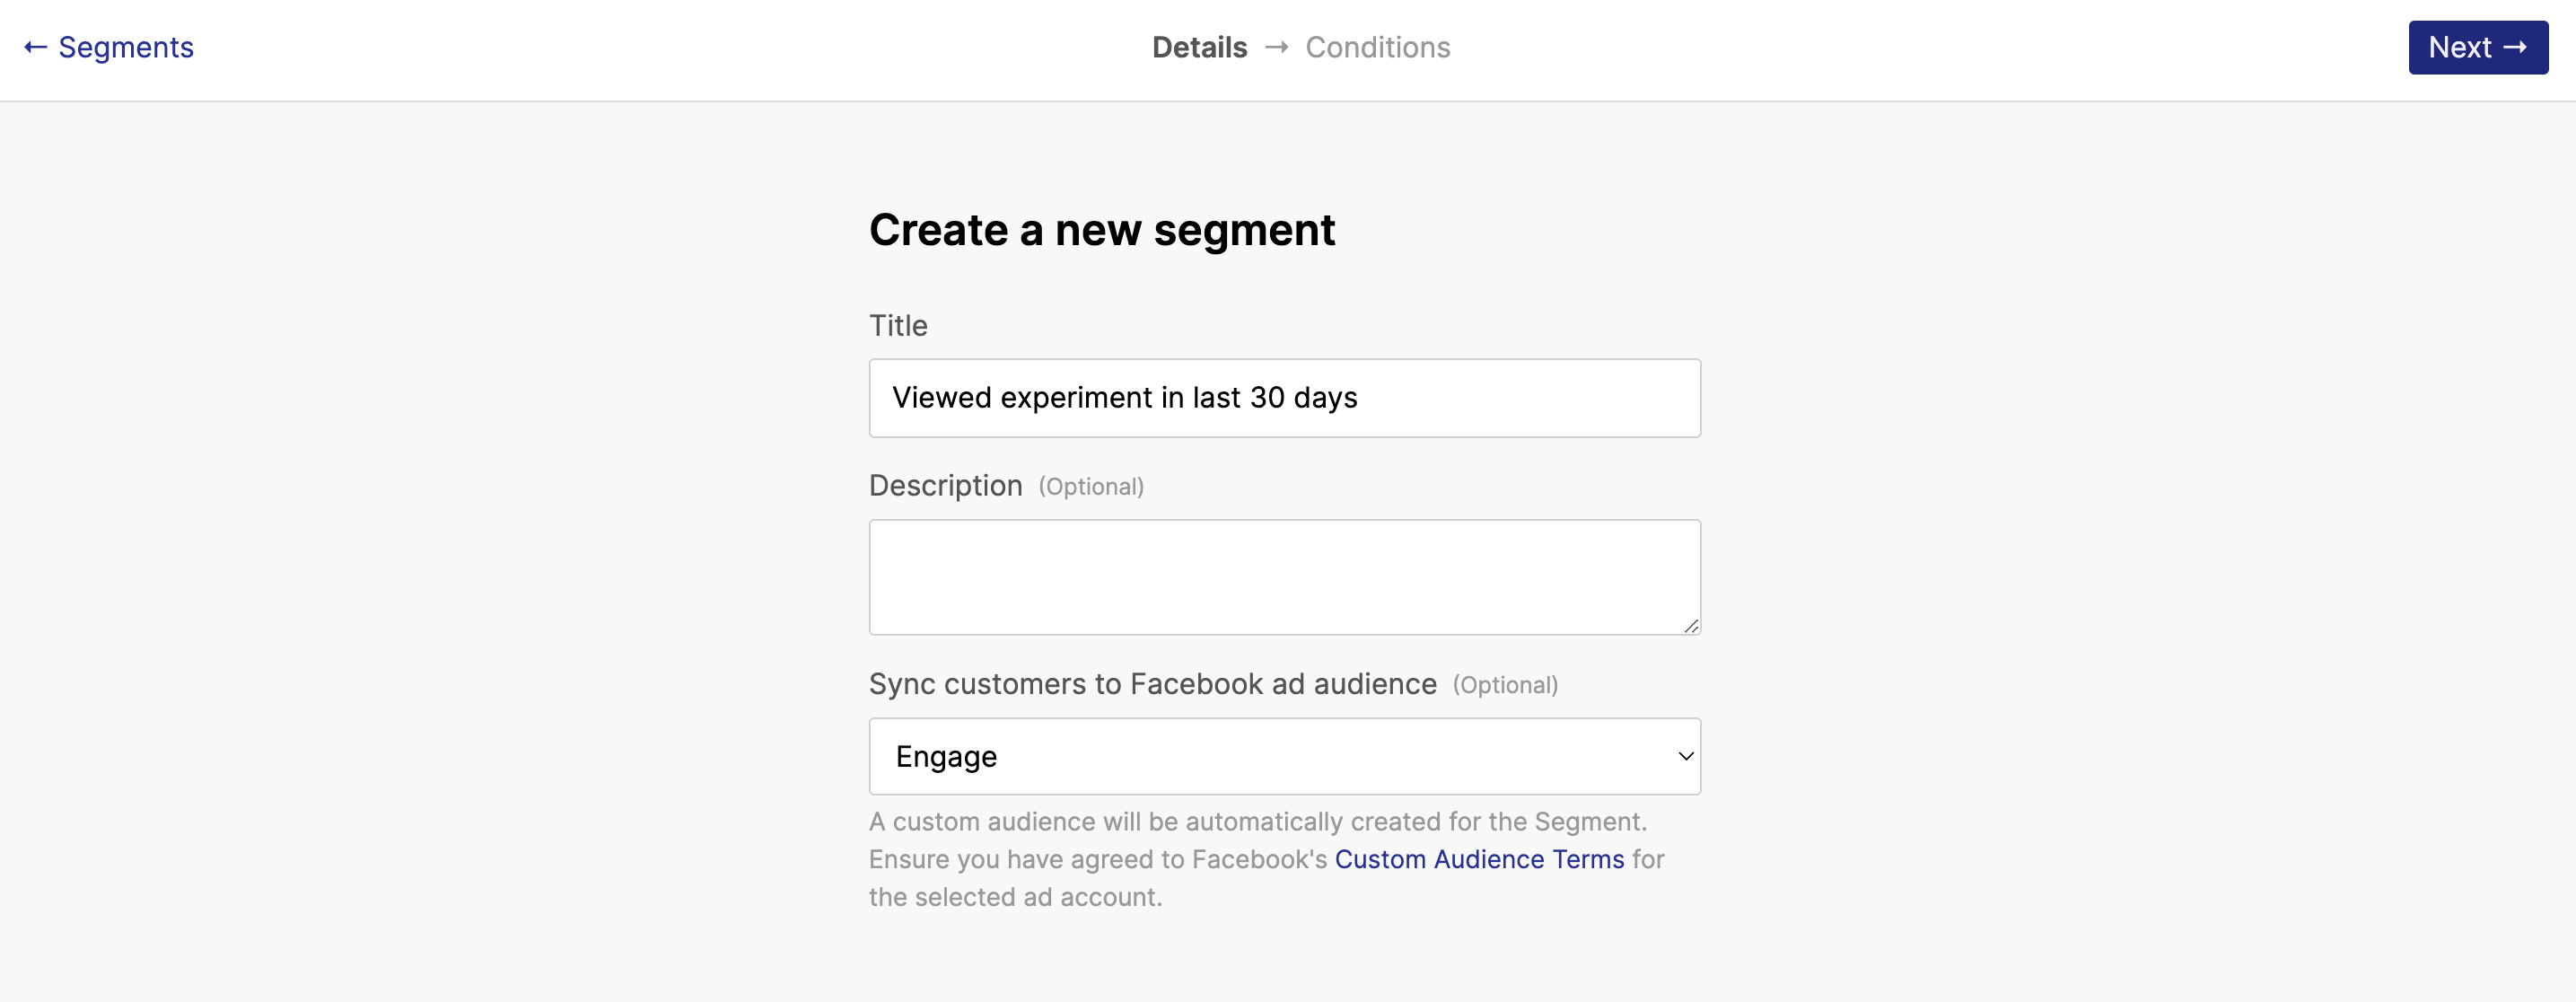
To create a Segment, visit the Segments page on your Engage dashboard and click on the “Create a new Segment” button.
On the Segment page, give your Segment a title and add an optional description. You can also connect your customers to a custom audience so that users synced to the Segment can also be synced to your custom audience.
The next page allows you define filters and conditions for your Segment. These conditions need to be met to add customers to the Segment. For customers already in the Segment, once these conditions are no longer met, they are removed from the Segment.
Reminder: Engage automatically manages adding and removing customers from a Segment. Once a Segment is created, no extra action is required by you. If you want a different way to group customers that allow you manually add and remove customers, take a look at Lists.
Condition filters
On the Conditions page, you will notice an area for defining your Segment conditions. We call this a condition group (more on this later). Inside each group is a filter. The filter is the smallest unit of the condition. Your Segment can have one or more filters. If you have more than one filter, there is a match option in every condition group to match all or any of the filters.
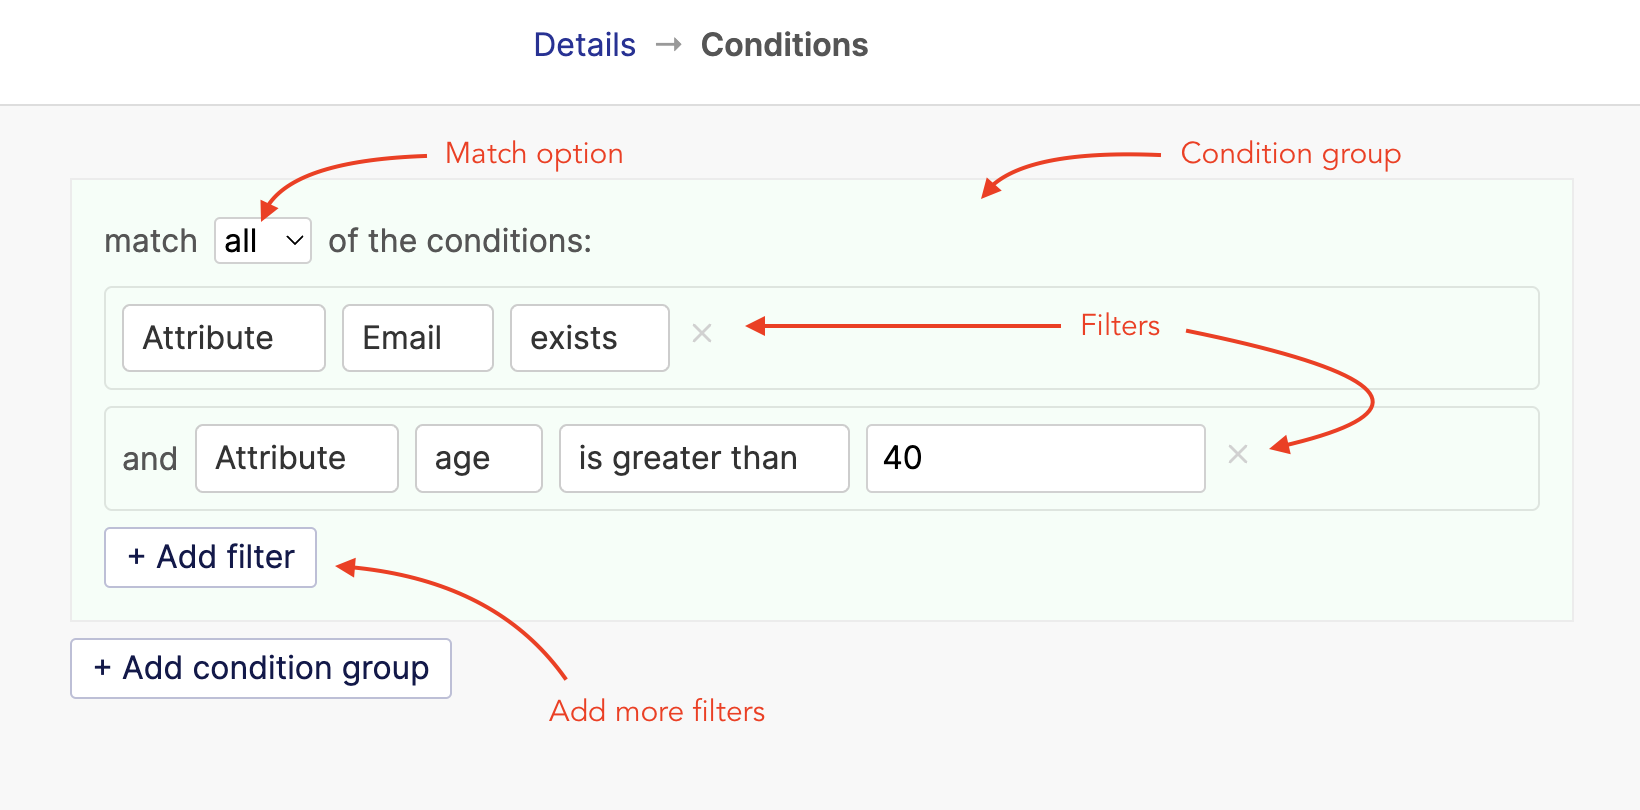
The first thing you will notice in a filter are the categories. Engage lets you create a filter based on 5 categories - Attribute, Event, Message, Stripe event, Paystack event, Segment/List.
Working with multiple filters
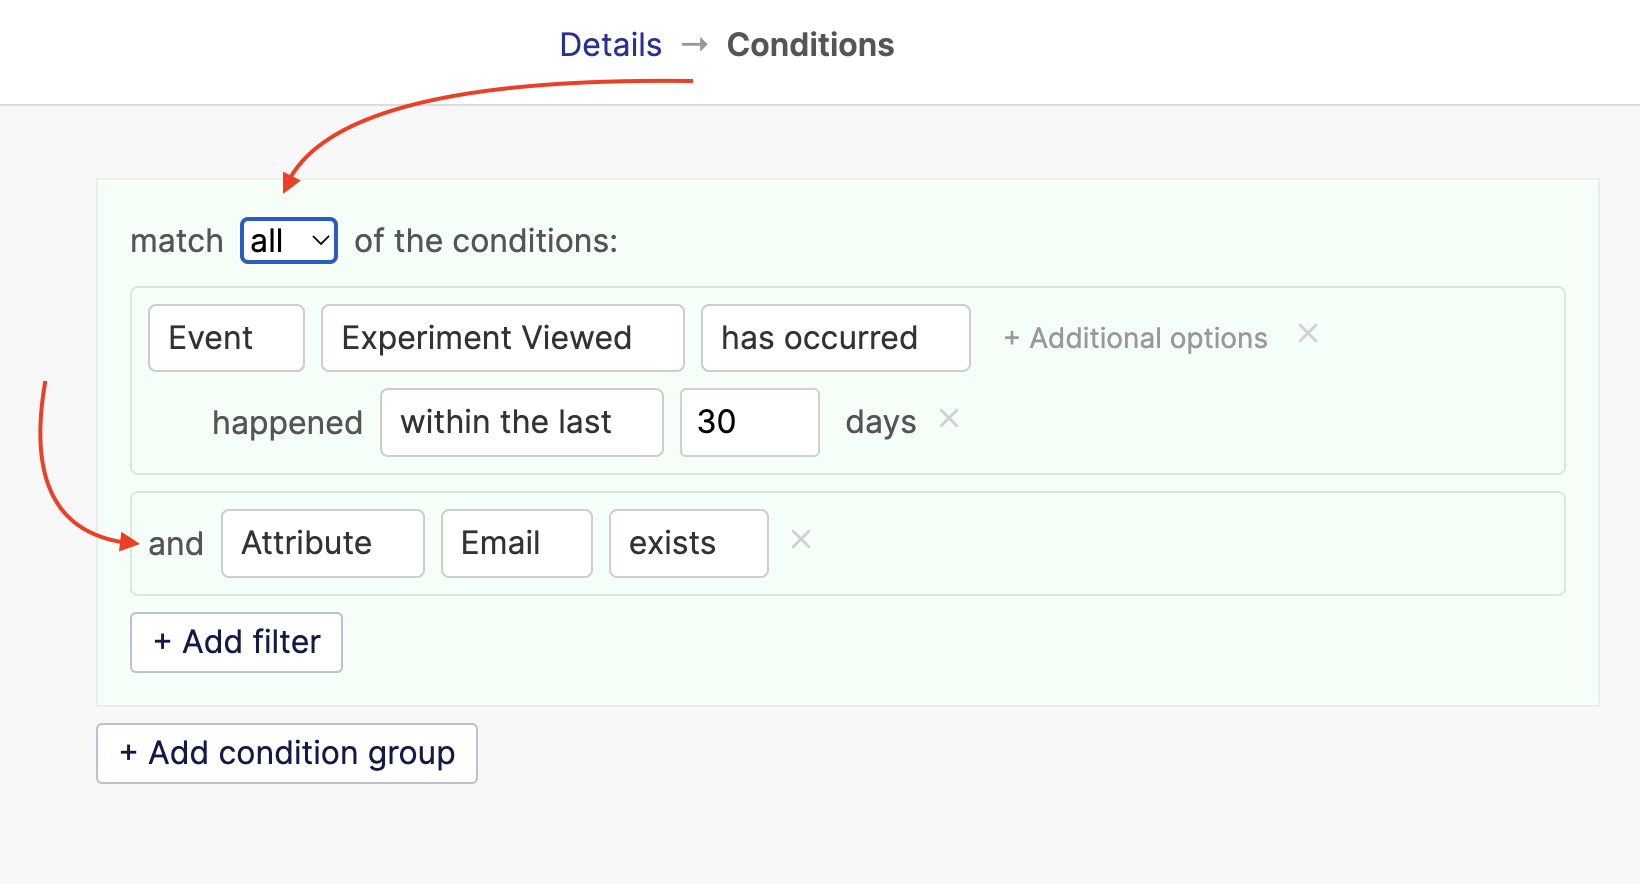
When working with multiple filters, you can decide how you want the filters to be interpreted. The match option at the top of the condition group lets you match all or any of the filters.
When set to “all” (default), the condition set by all the filters must be met by a customer to join the Segment. If one fails, the customer is not added.
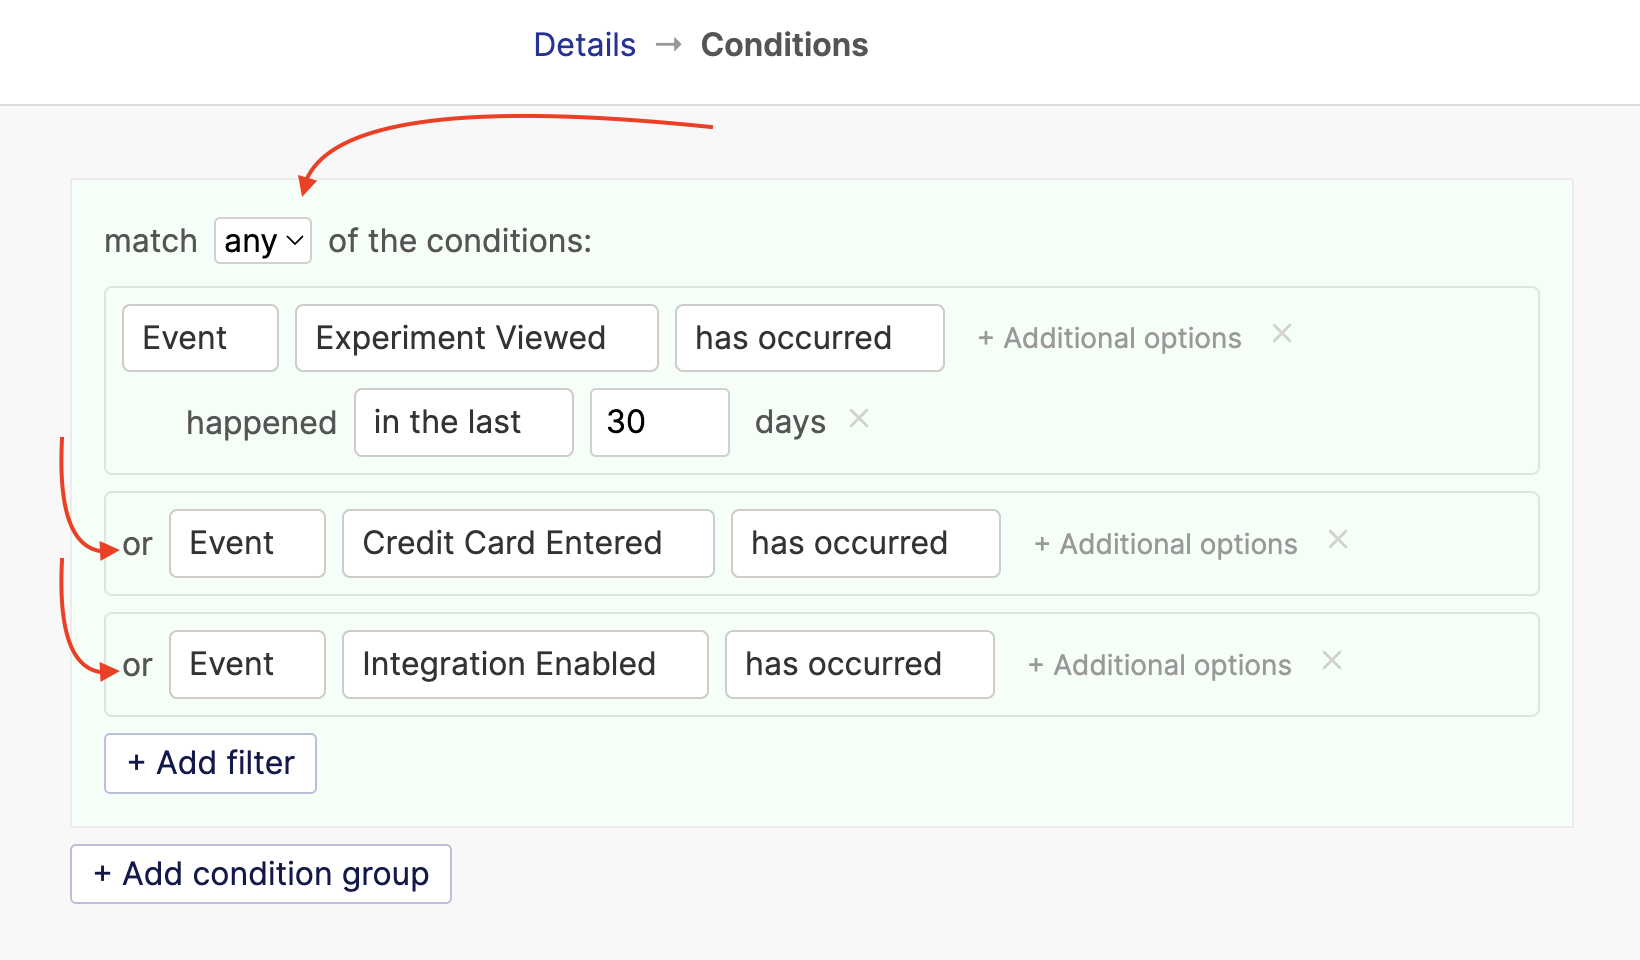
When set to “any”, only one of the filters need to be matched by a customer to join the Segment.
Condition groups
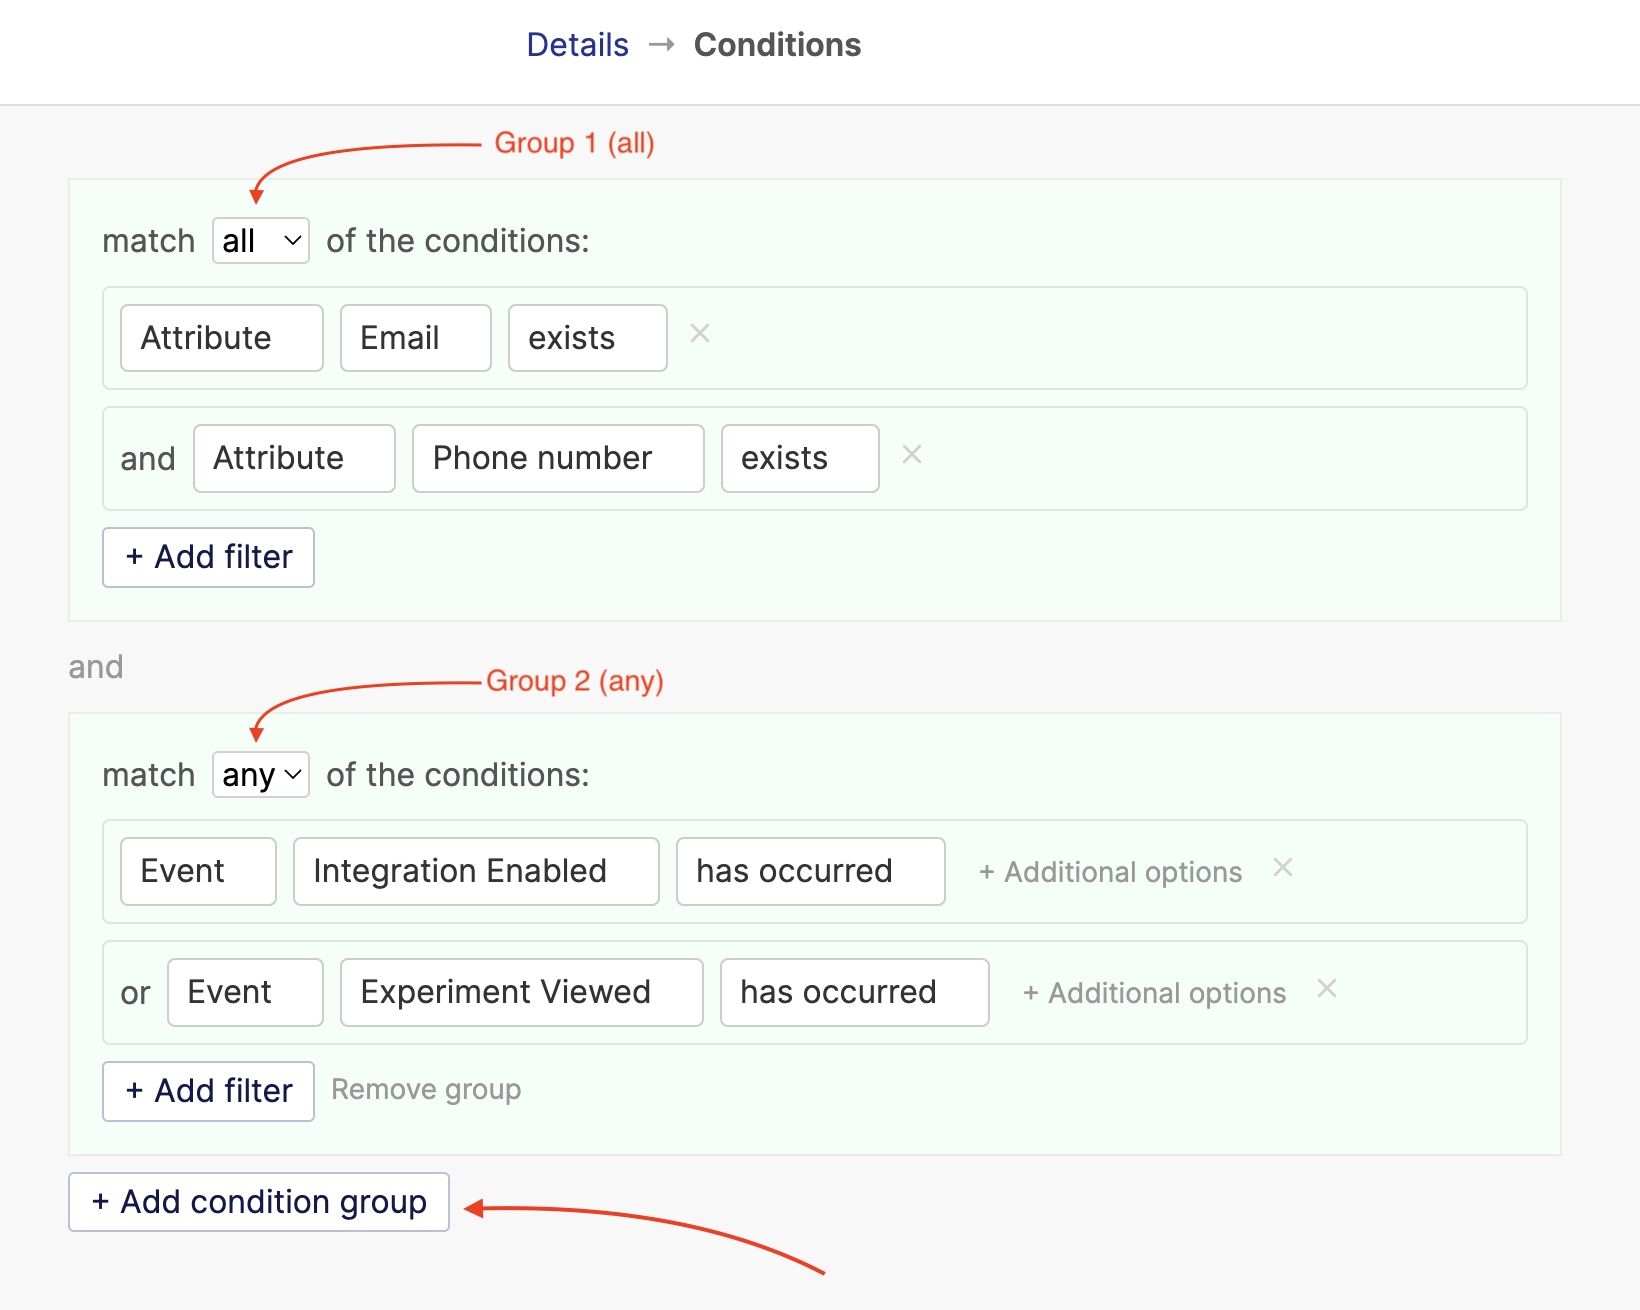
Condition groups let you group filters so you can match "all" or "any" of these groups. For example, you may want to create a Segment that match the following:
The user has an email and phone number
The user has performed any of the events: Integration enabled or Experiment viewed
"Condition groups" make this possible. Add filters with the same match option in a condition, click the “Add condition group” button, and add filters for the other match operator in the new group.
Testing your Segment
Before saving a Segment, you may want to test the conditions to see if it matches any user. This is a good way to ensure you have made no mistakes with the filters or entered values. To test the Segment conditions, click on the "Get sample data" button. This will get run a test and show you some sample user that match the Segment, if any.
Once you are satisfied with your Segment conditions, you can go ahead and save the Segment.
Was this article helpful?